
Page 16 - Architects Design and Installation Manual
P. 16
Page | 16 Quick Facts
Installation -Traditional ● Place against insulation, flat face outwards
Block inner-leaf ● Ties placed each 450mm board-course
Applies to SureCav25 & SureCav50
● Stagger joints to strengthen system
Installing the SureCav panel in a conventional building
1. You first need to create the corner panel. Locate the
bend line on the sheet and bend the flat sides together.
Now bend the sheet the other way until the pods are
touching, repeating this a couple of times until you have
the angle you require The SureCav panels are placed
directly against the insulation sheet, holding the
insulation in place, enabling it to work to its full
efficiency.
2. Using the joining strips, continue to build the panels
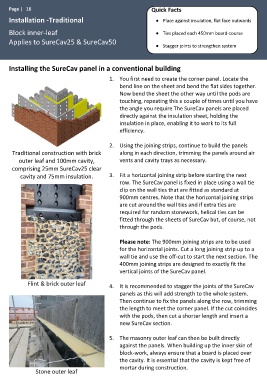
Traditional construction with brick along in each direction, trimming the panels around air
outer leaf and 100mm cavity, vents and cavity trays as necessary.
comprising 25mm SureCav25 clear
cavity and 75mm insulation. 3. Fit a horizontal joining strip before starting the next
row. The SureCav panel is fixed in place using a wall tie
clip on the wall ties that are fitted as standard at
900mm centres. Note that the horizontal joining strips
are cut around the wall ties and if extra ties are
required for random stonework, helical ties can be
fitted through the sheets of SureCav but, of course, not
through the pods.
Please note: The 900mm joining strips are to be used
for the horizontal joints. Cut a long joining strip up to a
wall tie and use the off-cut to start the next section. The
400mm joining strips are designed to exactly fit the
vertical joints of the SureCav panel.
Flint & brick outer leaf
4. It is recommended to stagger the joints of the SureCav
panels as this will add strength to the whole system.
Then continue to fix the panels along the row, trimming
the length to meet the corner panel. If the cut coincides
with the pods, then cut a shorter length and insert a
new SureCav section.
5. The masonry outer leaf can then be built directly
against the panels. When building up the inner skin of
block-work, always ensure that a board is placed over
the cavity. It is essential that the cavity is kept free of
mortar during construction.
Stone outer leaf